Setup Instructions
Neo-Arcade Board
Quick Setup
Get your boards operational!
- Place your Neo-Arcade boards in position on the button panel they will power, one board per player.
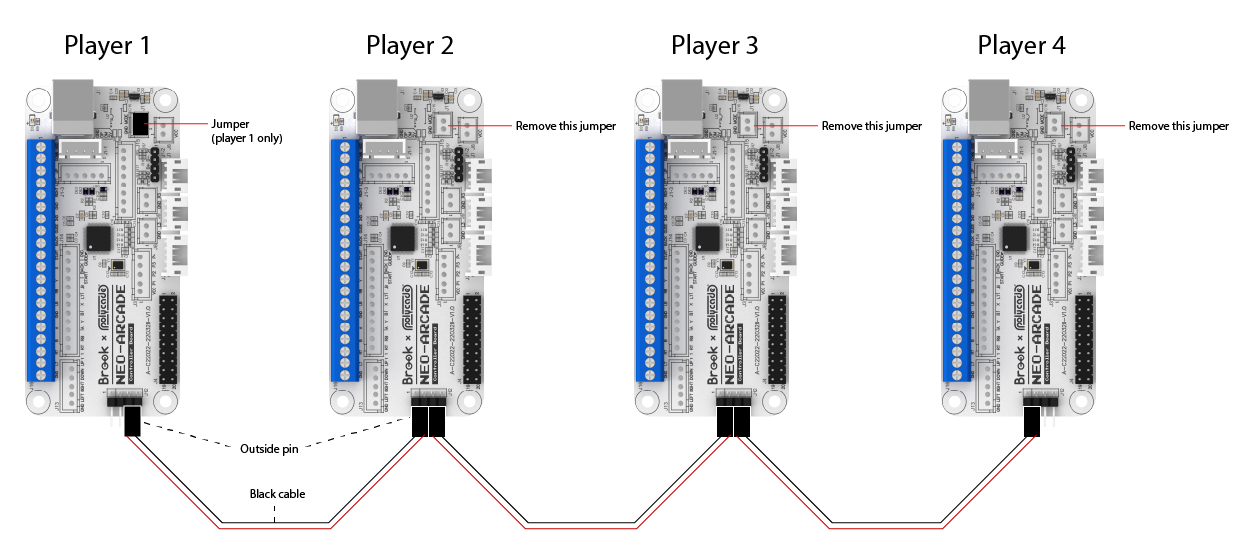
- Locate the 4 pins titled "J12" on the end opposite the USB connection for each board.
- Using the included 2-wire cable, connect the boards together in a daisy-chain fashion, making sure to keep the black cable on the outside pin in every connection (see image below).
- Remove the jumper from all boards EXCEPT player 1 (see image below).
- Connect buttons and joysticks! (more about this below)
- Once you have buttons and joysticks connected, plug the boards into your computer using a USB cable.
- With your computer ON, we now need to reset the boards. This reset must happen any time the USB cables are unplugged and plugged back in. In order to perform the reset, hold down the all of the following buttons for 5-7 seconds: A+B+RB+RT+Start

Button & Joystick Wiring
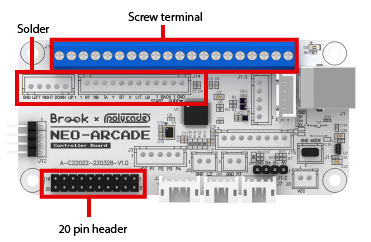
- There are three different ways to connect your buttons & joystick to the board: the screw terminal, 20 pin header, or the solder points. We feel the 20 pin harness is the best option, as it offers an unfailing connection with flexibility. If you don't have a 20 pin harness, then you can use either the screw terminals or the solder points, whichever you prefer.
- When connecting a button, you will connect 2 cables: the ground cable and the button-specific cable.
- Because there are only a few ground (GND) connections, you will want to use a daisy-chained ground cable. Make sure to get the correct size "quick-connects" for the buttons you are using.
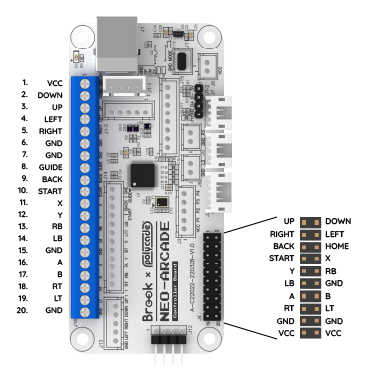
- Refer to the button map below for which button connects where.


Didn't find what you were looking for? Contact us.
